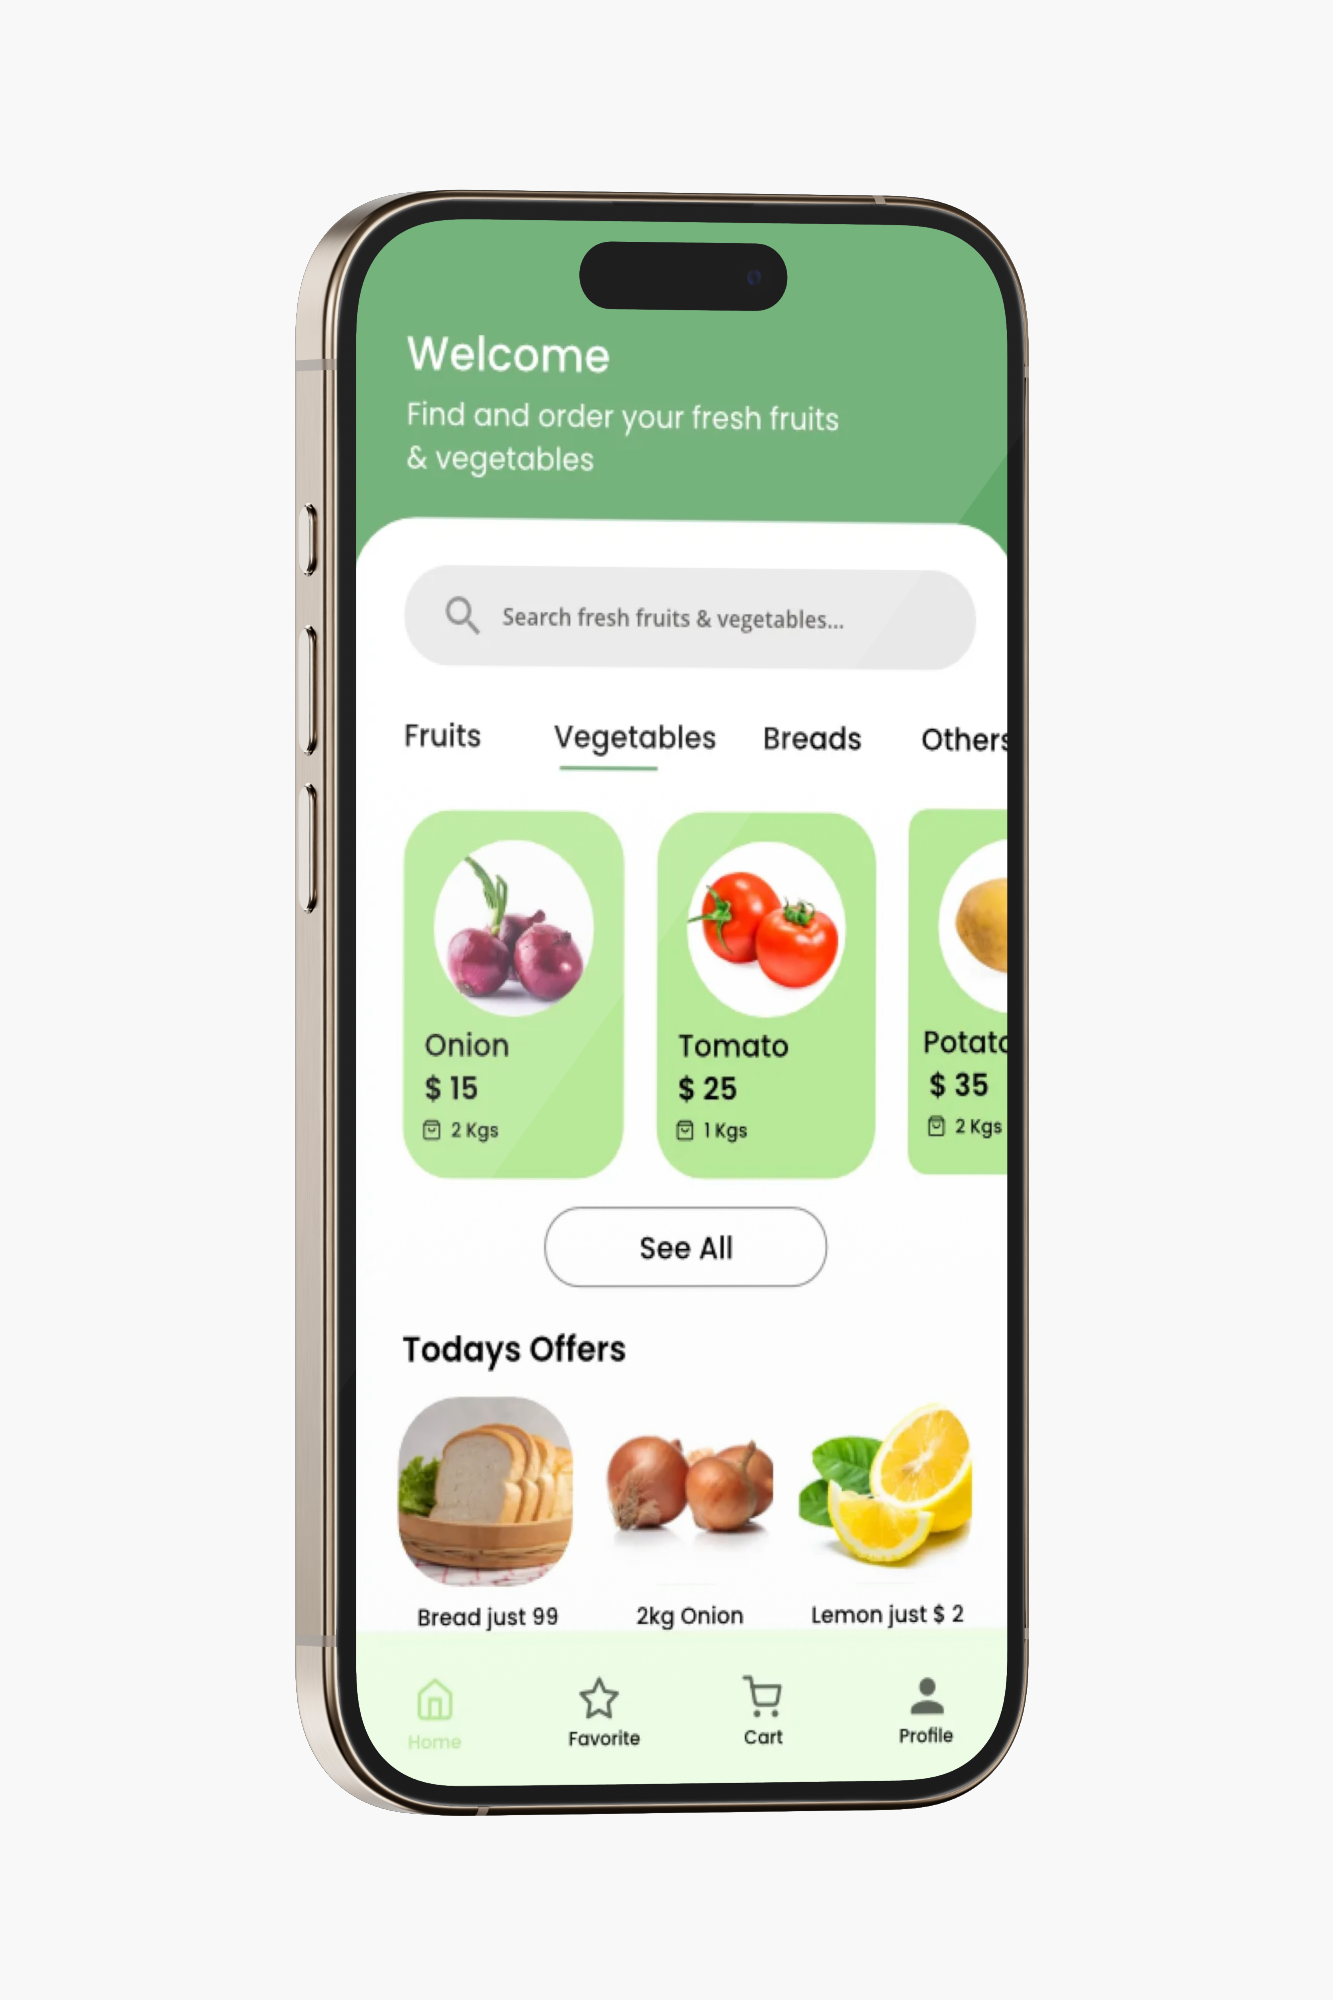
The Boolfly Grocery Store Demo is a mobile application designed to showcase the integration of Magento 2’s GraphQL API in an eCommerce environment. This demo serves as a comprehensive training tool for internship students, focusing on the core aspects of modern mobile app development and eCommerce integration. Additionally, a Node.js microservice powers the search feature, ensuring fast and relevant product search results.
Key features include:
Product Details Page: Fetches detailed product information, including images, descriptions, pricing, and availability directly from Magento’s GraphQL API.
Category Pages: Displays product categories dynamically, allowing users to browse and filter products with ease.
User Authentication: Implements login and registration functionality, allowing users to create accounts, sign in, and manage their sessions securely.
Shopping Cart: Users can add products to their shopping cart, view item details, and proceed to checkout.
Checkout Flow: Facilitates the checkout process, including order summary, shipping information, and payment options.
System Architecture Grocery Store
This demo app will provide a hands-on learning experience for interns, helping them understand the integration of GraphQL with mobile platforms, along with key eCommerce functionalities such as product management, user accounts, and transactions.
By interacting with the demo, interns will gain practical knowledge of how a mobile application communicates with an eCommerce backend, making it an essential learning tool for modern mobile development in the context of Magento-based stores.
By default Docker Desktop allocates 2GB memory. This leads to extensive swapping, killed processed and extremely high CPU usage during some Magento actions, like for example running sampledata:deploy and/or installing the application. It is recommended to assign at least 6GB RAM to Docker Desktop prior to deploying any Magento environments on Docker Desktop. This can be corrected via Preferences -> Resources -> Advanced -> Memory. While you are there, it wouldn’t hurt to let Docker have the use of a few more vCPUs (keep it at least 4 less than the maximum CPU allocation however to avoid having macOS contend with Docker for use of cores)
Setup Backend
Install Warden
Warden may be installed via Homebrew on both macOS and Linux hosts:
Terminal window
brewinstallwardenenv/warden/warden
warden
DNS Resolution
Linux / Windows (WSL2)
Add the following line to /etc/hosts:
Terminal window
127.0.0.1app.grocery-store.test
Note: If you’re using Windows with WSL2, you also need to add to C:\Windows\System32\drivers\etc\hosts
Note
If you’re using Windows with WSL2, you also need to add to C:\Windows\System32\drivers\etc\hosts
Tip
For more information see the configuration page for Automatic DNS Resolution.
Use your phone to scan the QR code shown on the terminal.
Configuration
Automatic DNS Resolution
MacOS
On Mac OS, DNS resolution is configured automatically for *.test domains using a feature Mac OS inherits from BSD. When warden install is run (or warden svc up for the first time) the following contents are placed in the /etc/resolver/test file. This has the effect of having zero impact on DNS queries except for those under the .test TLD.
Terminal window
nameserver127.0.0.1
Linux (systemd-resolved)
This approach works on most modern (systemd based) operating systems. systemd-resolved can be configured to forward the requests of .test TLD to another DNS server. The configuration file is typically located at /etc/systemd/resolved.conf and /etc/systemd/resolved.conf.d/*.conf. Run the following commands to configure systemd-resolved:
In order to sign SSL certificates that may be trusted by a developer workstation, Warden uses a CA root certificate with CN equal to Warden Proxy Local CA <hostname> where <hostname> is the hostname of the machine the certificate was generated on at the time Warden was first installed. The CA root can be found at ~/.warden/ssl/rootca/certs/ca.cert.pem.
On MacOS this root CA certificate is automatically added to a users trust settings as can be seen by searching for ‘Warden Proxy Local CA’ in the Keychain application. This should result in the certificates signed by Warden being trusted by Safari and Chrome automatically. If you use Firefox, you will need to add this CA root to trust settings specific to the Firefox browser per the below.
On Ubuntu/Debian this CA root is copied into /usr/local/share/ca-certificates and on Fedora/CentOS (Enterprise Linux) it is copied into /etc/pki/ca-trust/source/anchors and then the trust bundle is updated appropriately. For new systems, this typically is all that is needed for the CA root to be trusted on the default Firefox browser, but it may not be trusted by Chrome or Firefox automatically should the browsers have already been launched prior to the installation of Warden (browsers on Linux may and do cache CA bundles).
Note
If you are using Firefox and it warns you the SSL certificate is invalid/untrusted, go to Preferences → Privacy & Security → View Certificates (bottom of page) → Authorities → Import and select ~/.warden/ssl/rootca/certs/ca.cert.pem for import, then reload the page.
If you are using Chrome on Linux and it warns you the SSL certificate is invalid/untrusted, go to Chrome Settings → Privacy And Security → Manage Certificates (see more) → Authorities → Import and select ~/.warden/ssl/rootca/certs/ca.cert.pem for import, then reload the page.
Database
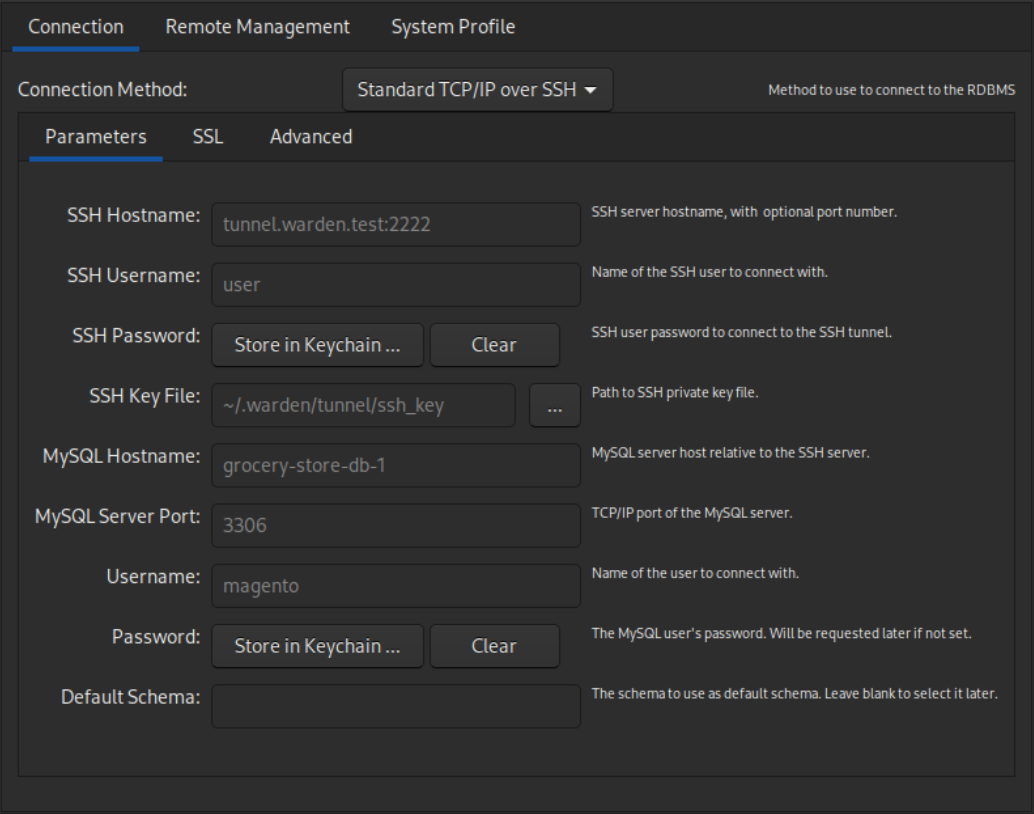
Database Connection
Common Settings
Name
Value/Description
MySQL Host
grocery-store-db-1
MySQL Port
3306
MySQL User
magento
MySQL Password
magento
MySQL Database
magento
SSH Host, Proxy Host, Server
tunnel.warden.test
SSH Host Port
2222
SSH User
user
SSH private key file
~/.warden/tunnel/ssh_key
MySQL Workbench
MySQL workbench setup connection
Database Dump
Import Database
Terminal window
pvgrocery-store.sql.gz|gunzip-c|wardendbimport
Tip: If you don’t have pv installed, use cat instead:
You’ve successfully set up a complete Magento 2 backend with Docker and Warden, integrated with a React Native mobile application. This setup provides a robust development environment for building modern eCommerce applications with GraphQL APIs.